The Ultimate Preacher Curl Setup Guide: 6 Steps to Isolate Your Biceps and Force Max Growth

Share
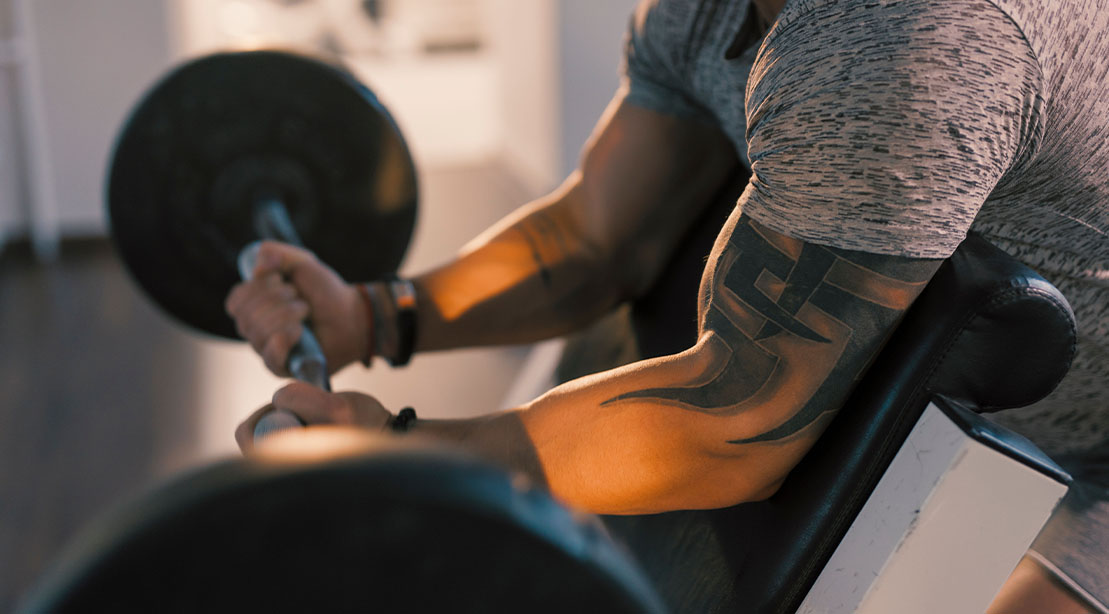
The preacher curl is a fantastic biceps builder. By supporting the upper arms on a pad, it minimizes momentum and requires the biceps to do most of the work.
But there’s a catch.
The preacher curl is only as effective as your setup. It’s not as simple as sitting down, then gripping and ripping, but it’s about creating the necessary tension in the biceps while eliminating everything else.
Now, whether you’re using an EZ-curl bar, a straight bar, or a preacher curl machine, the setup principles remain the same.
This checklist breaks down those fundamentals step by step. The setup may feel slow at first, but once it becomes second nature, every rep will be far more effective at achieving the preacher curl’s intended purpose—improving flex time.
Let’s dive in.
How to Set Up the Preacher Curl for Maximum Biceps Isolation
It may seem overboard to set up an isolation exercise like this, but the biceps are just that important.
Step 1: Adjust the Seat and Pad Height
Before gripping, adjust the preacher curl to fit you. Don’t overlook this step because it has the biggest impact on how effective the exercise is. When the seat is set up for you, the upper arms are where they should be, setting you up for success.
Adjust the seat so your armpits rest comfortably at the top edge of the preacher pad.
Get your chest against the pad.
Your upper arms are supported from shoulder to elbow.
Internal cue: Upper arms glued to the pad.
External cue: Armpits on the top edge.
Coach’s Tip: Before starting, straighten your arms and lightly contract your biceps. If the upper arms stay planted without moving, you’ve found the right setup.
Step 2: Foot Position and Base of Support
A stable lower body creates a stable upper body. If you’re shifting around during the set, you’re wasting valuable energy. A solid base helps eliminate this, allowing the biceps to do the work.
Plant both feet firmly on the floor.
Position them about hip-width apart.
Sit tall with your hips planted.
Internal cue: Stable from the ground up.
External cue: Push your feet into the floor.
Coach’s Tip: If you find yourself moving, don’t blame the exercise—blame the weight. Lower the weight and reset.
Training
Wide Grip vs. Close Grip Barbell Curls
Which one is better?
Read article
Step 3: Grip Width and Hand Position
The grip influences everything from wrist comfort to elbow movement and the amount of tension on the biceps. Whether you’re using an EZ-curl bar, a straight bar, or a machine, the goal is the same: create a solid connection.
Grip the bar at approximately shoulder-width or slightly narrower, depending on what feels most comfortable.
Place the bar deep in your palms.
Keep your wrists as neutral as possible.
Internal cue: Crush the handle.
External cue: Pull the bar apart.
Coach’s Tip: Imagine you’re pulling both ends of the bar away from each other as you curl. This subtle cue increases upper-body tension and helps keep your elbows happy.
Step 4: Shoulder and Elbow Position
With your grip set, it’s time to focus on the two joints that allow you to build the biceps: the shoulders and elbows. When your shoulders stay packed and your elbows remain fixed, the biceps are in a better position to do the work.
Pull your shoulders down and back before you begin the curl.
Press the triceps into the pad.
Allow your elbows to act as hinges—your upper arms should stay still.
Internal cue: Elbows stay home.
External cue: Pin your triceps to the pad.
Coach’s Tip: If your elbows start lifting off the pad during the last few reps, you lose control. Reduce the load until you can keep your upper arms glued to the pad for the entire set.
Step 5: Create Tension Before the First Rep
The bottom position is not the time to relax and rest. Instead, take the slack out of the movement before the first curl. This pre-tension keeps the biceps engaged from the start and improves elbow stability, making every rep feel better.
Continue to squeeze the bar before initiating the rep.
Keep your triceps pressed into the pad.
Brace your core and maintain light pressure through your feet.
Lightly contract your biceps.
Internal cue: Load my biceps.
External cue: Take the slack out (of the biceps).
Coach’s Tip: Before your first rep, gently pull up on the bar without moving it. That slight contraction creates the tension you need for a better rep.
Step 6: Head and Neck Position
Poor head position often leads to poor body position. Looking down at the bar or craning your neck can cause your shoulders to round forward, reducing the exercise’s effectiveness.
Maintain a neutral neck throughout.
Focus your eyes straight ahead but glance down if you need to.
Keep your chin tucked slightly.
Internal cue: Long neck, relaxed jaw.
External cue: Eyes forward.
Coach’s Tip: If you catch yourself losing head and neck position, it’s a sign of fatigue. Reset and keep your gaze fixed ahead.
The Step-by-Step Preacher Curl Form Checklist
Run through this green light checklist before biceps greatness.
Seat adjusted: armpits resting comfortably at the top of the pad
Feet planted: stable base with light pressure into the floor
Shoulders packed: down and back
Triceps pinned: upper arms against the pad
Grip set: bar deep in the palms, wrists neutral and trying to pull the bar apart.
Create tension: Pull up on the bar slightly
Core braced: torso stable without leaning
Head neutral: eyes forward
If every box is checked, you’re good to go.
How to Fix Common Preacher Curl Form Mistakes
Small form errors take away from the preacher curls’ effectiveness. Clean up these mistakes, and every rep will be more effective.
Sitting Too High or Too Low
Your upper arms aren’t fully supported on the pad; other parts of your upper body may compensate.
The Fix: Adjust the seat so your armpits rest comfortably at the top of the preacher pad, and your triceps stay in contact with it throughout the set.
Lifting The Elbows Off the Pad
As the weight gets heavier or you get tired, your elbows lift off the pad, and the anterior delts start to do the work.
The Fix: Reduce the weight and focus on keeping your triceps pinned to the pad. Also, stop when you get tired.
Curling With Your Shoulders
Instead of bending only at the elbows, you roll your shoulders forward to finish the rep.
The Fix: Before the first rep, pack your shoulders down and back, and think of your elbows as door hinges. Your upper arms should remain stationary while the forearms move.
Relaxing at the Bottom
You completely unload the biceps between reps, forcing them to restart from a deadstop each rep.
The Fix: Maintain light tension at the bottom by keeping your grip tight and your biceps engaged. Don’t let the weight pull you into a fully relaxed position.
Final Thoughts
The preacher curl is one of the purest tests of biceps isolation. When your setup is dialed in, there’s nowhere to hide. Your biceps either move the weight, or they don’t.
Master the setup, and let your biceps go to work.